
This Letter Fold is based on a hexagonal coaster design that is in the public domain. There are, however, a few modifications that are required in order to make it work as an interesting letter fold for American Letter and A4 sheets. (Yes, this model works for international sized paper, too.)
The standard methods that origami enthusiasts use to make a hexagon from a rectangular sheet assume that the folder will cut off the excess paper and just fold up the hexagon. A letter sheet or some other rectangle is commonly used and the folding it begun from one end of the sheet. These Letter Fold versions start in the center of the paper. The means that the excess paper is evenly distributed at the top and the bottom of the rectangular sheet after the basic hexagon shape is derived. We do not cut it off.
BASIC FULL COLORED VERSION
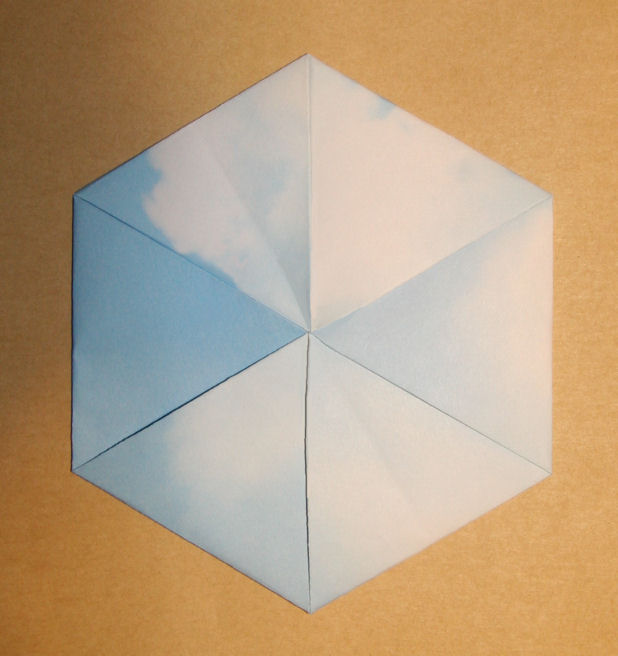
The basic full color version displays the colored side of the letter head paper and tucks the extra-hexagon parts inside the model. For this reason, it works best with the thinner versions of letter head paper.
 The front shows the tucked in sections. The back simply shows crease marks. You can add extra crease marks to make the model completely symmetrical instead of having just one crease joining mid points on opposite sides.
Here is the Crease Pattern for the Basic (Full Colored) Version.

The orange sample shows the front (on the left) and the back (on the right) of a model using the basic method with the addition of extra creases (mid side to opposite mid side) between all sides. If you make these pronounced it will allow the model to be used as a spinner. The message inside could be something like "You make my world go around".
Here is the crease patterns for the Full Colored Spinner Version. The additional creases are marked in orange (mountain) and lime green (valley). Smart people (= you) can probably figure out how to add them without referring to the Crease Pattern.

If the model is folded up from the colored side, instead of from the white side, we get a model that displays the colored edges. This "waste" paper becomes a decorative feature instead of being hidden inside the model. This is the recommended model if you want to write on the letter head side of the paper rather than the white (or other colored) side.


Here is the Crease Pattern. It's the same as the All Color version in reverse. If your paper is strongly patterned on the Letter Head side (which is not very usual for such paper) then you will find it easier to do all your preliminary folding on the white side; the crease lines are easier to see. It is relatively easy to reverse the crease direction prior to folding up the model into the coaster shape with the colored side of the paper up.


Of course, there is a Spinner Version of this variety also. We just add some well creased additional creases connecting the mid points of opposite sides. That's not nearly as difficult as the Crease Pattern makes it look. We mountain fold between the hexagon's section boundaries and valley fold between the mid points of the opposing sides. Look at the pictures for clarification.


FULLY DIAGRAMMED INSTRUCTIONS.
I have provided the basic crease patterns here but I am in the process of putting the finishing touches to fully diagrammed instructions. They will be available for purchase when they are completed. The cost will be quite small (so you can all afford it) but it will help provide the essentials that I need to complete diagrams of other models show-cased on this Blog. As you are probably aware, good diagramming takes quite a bit of time to do properly.
Here is a sample of what you will get.


